My previous Proxmox post described how to install Sierra into Proxmox using the Enoch bootloader (SeaBIOS boot). Since then, I’ve been using it as my daily-use desktop, and it has generally been working out great for me. However, I had some real struggles getting the graphics card passthrough to work reliably. I managed to fix these by updating to UEFI boot with Clover.
One of the problems with legacy BIOS boot and GPU passthrough is VGA arbitration. From what I understand, the video cards in the host and guest can end up both contending to own the VGA resources, which can cause a deadlock on boot. When a Sierra guest loads its video driver during boot, my Proxmox host hangs, and the screen fills with black and white bars.
UEFI boot doesn’t suffer from this problem, since it does away with the legacy VGA interface. So if your video card’s firmware supports UEFI/EFI boot (my R9 280X already does), you can switch the guest to boot using OVMF instead. This requires us to use a macOS bootloader that supports UEFI. I chose Clover.
However, there’s an issue at the moment with Clover and QEMU which causes macOS’s detected CPU speed to be wrong. This makes window animations, the system clock, movie players, typematic repeat, etc., run much too fast or too slow.
On Proxmox 4.4, we have to patch Clover to fix this, follow the instructions in the next section.
Proxmox 5 has support for telling macOS exactly what the CPU’s frequency is, by exposing a VMWare-style interface that macOS knows how to read. This fixes the CPU speed problem. So on Proxmox 5, we can just edit the VM configuration to enable this feature, and afterwards we can install an unmodified official Clover release (I’m using r4097) using the install instructions further down this page.
Building your own copy of Clover with the QEMU CPU speed patch for Proxmox 4.4
You can either just download my prebuilt patched Clover r4061 / EDK2 r24132 installer, or follow the instructions in this section to patch and build Clover yourself.
We’ll be following the official Clover building instructions, but we’ll be modifying those slightly.
Install XCode from the App Store before you start. Run “sudo xcodebuild -license” to accept the license agreement. Run “sudo xcode-select –install” to ensure the command-line tools are installed.
Note that when the instructions say to make a directory called “src” in your home directory, you should listen! There are hardcoded paths that will look for built tools in that directory, so it’s much easier to just go with the flow here.
Fetching Clover source
Follow steps 1-3 from the section “compiling from source“, with some changes:
On the line that fetches EDK2:
svn co -r 18198 svn://svn.code.sf.net/p/edk2/code/trunk/edk2 edk2
Fetch EDK2 revision 24132 instead:
svn co -r 24132 svn://svn.code.sf.net/p/edk2/code/trunk/edk2 edk2
When it checks out the latest Clover source:
svn co svn://svn.code.sf.net/p/cloverefiboot/code Clover
Check out revision 4061 instead:
svn co -r 4061 svn://svn.code.sf.net/p/cloverefiboot/code Clover
You can skip the line that runs “./buildgcc-4.9.sh”, since we’ll be using XCode instead.
Apply the patch
User “arne ziegert” over on the Clover issue tracker came up with a patch to fix the CPU speed issue on QEMU, which we’ll apply before we build Clover.
Download this patch to “edk2/Clover”. Change into that directory and run:
svn patch clover-r4061-qemu-cpu-speed-patch.diff
Build Clover
Change into the “edk2/Clover” directory, and run:
./ebuild.sh
The default options, which use XCode to build an X64 bootloader, are perfect for us.
After that completes, run “cd CloverPackage; ./makepkg”. This will produce an installable package for us in “edk2/Clover/CloverPackage/sym/Clover_v2.4k_r4061.pkg.”.
Proxmox 5: Enabling vmware-cpuid-freq support
In Proxmox 5, we don’t need to patch Clover, we just need to enable the vmware-cpuid-freq feature on the CPU in our VM’s configuration.
You should currently have an “args:” option in your VM configuration that contains:
-cpu Penryn,kvm=off,vendor=GenuineIntel
We need to edit that to add +invtsc to enable invariant timestamp counter support, add the vmware-cpuid-freq option, and turn kvm back on (exposing the fact that this is a virtual machine to macOS):
-cpu Penryn,kvm=on,vendor=GenuineIntel,+invtsc,vmware-cpuid-freq=on
Install Clover to the EFI partition
At this point you might want to take a snapshot of your Sierra install, so you can roll things back if it goes wrong. Though note that we will still be able to boot with Enoch/SeaBIOS even after we’re done, so if you mess up Clover/OVMF, you should be able to switch right back to SeaBIOS in your VM options to fix things.
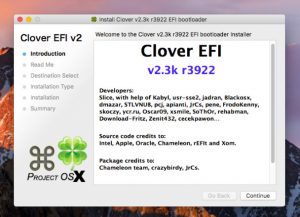
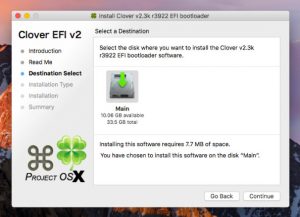
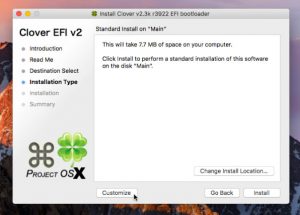
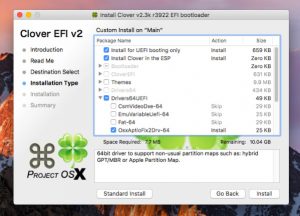
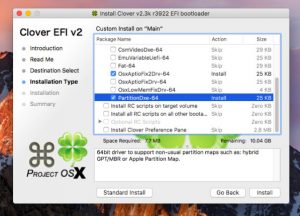
Run the Clover.pkg installer in your Sierra guest:
The Clover installer should leave the EFI partition mounted for us. Open that up in Finder.
Replace the EFI/CLOVER/config.plist file with this one, which I got from Spaceinvader One’s unRAID tutorial.
Put this q35-acpi-dsdt.aml file from QEMU into “EFI/CLOVER/ACPI/origin”. (This file is no longer part of the latest QEMU revision, however the last revision which contained it can be browsed here.)
Configure Proxmox to use OVMF/UEFI
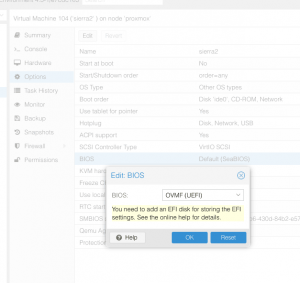
We’re nearly done! Just switch over to OVMF in your VM’s settings:
Now fire it up!
Editing your Clover/EFI settings in the future
You can use the Clover Configurator tool to edit your Clover configuration. This tool should mount the EFI partition for you. If you want to mount it manually, first check the device name of the EFI partition in the terminal:
~$ diskutil list
/dev/disk0 (external):
   #:             TYPE   NAME           SIZE       IDENTIFIER
   0: GUID_partition_scheme             512.1 GB   disk0
   1:              EFI   EFI            209.7 MB   disk0s1
   2:        Apple_HFS   Main           511.8 GB   disk0s2
Then you can mount it like so:
sudo mkdir /Volumes/EFI
sudo mount -t msdos /dev/disk0s1 /Volumes/EFI
Alternative process: Dedicated Clover boot device
Rather than installing Clover by executing the .pkg on the guest, you can attach a dedicated Clover disk to your VM and just fill it with a Clover disk image that I’ve prepared.
On the hardware tab, add a new disk of size 1GB to hold Clover (if you’re already using IDE0 then add to IDE2). On the options tab, change the boot order to boot from this drive.
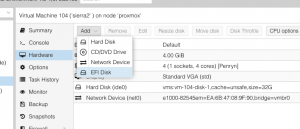
If you haven’t already switched your VM settings from SeaBIOS to OVMF, change the BIOS type to OVMF on the options tab, and add an EFI disk to store UEFI settings on the hardware tab.
If you have the Sierra install DVD mounted, make sure the line for that in your VM’s config contains the “media=cdrom” flag (unlike Enoch which needed that to be removed). For example:
sata0: local:iso/Install_macOS_Sierra.iso,media=cdrom,size=6074010K
Download this Clover disk image (5MB, uncompresses to 1GB), upload it to Proxmox and unpack it there with “gunzip clover-r4061-1gb.img.gz”. Now write that image onto the 1GB disk you added. For my ZFS-backed volume, that was accomplished with:
dd if=clover-r4061-1gb.img of=/dev/zvol/tank/vms/vm-104-disk-2 bs=1M
Be sure to get the device name correct so you don’t overwrite the wrong drive! Now you should be able to use this Clover boot disk to boot the Sierra installer, or an already-installed copy of Sierra.

Nick
Noticed this post too, can you install this bootloader before OSX has installed?
I can t run your installer direct on promox
Yes, that should be possible. I’ll see if I can get it to work, and upload a Clover disk image for you.
Thanks you are a star
I’ve now added a section to the bottom of this post which has the Clover disk image and instructions for using it.
Nick
Picking up a
kvm: -drive if=pflash,unit=1,id=drive-efidisk0,format=raw,file=/media/disk1/images/105/vm-105-disk-2.raw: oversized backing file
Did you accidentally overwrite the proxmox EFI settings disk with another volume? Try removing the EFI disk from the hardware page and re-adding it.
I dd the clover to the EFI partition, was I supposed to just add another HDD and dd the Clover to that?
The “EFI” disk you see is a 128kB file that Proxmox uses to store UEFI settings like boot screen resolution and boot disk selection. You’re not supposed to touch that one!
I’ve updated the blog post to be a little more clear there.
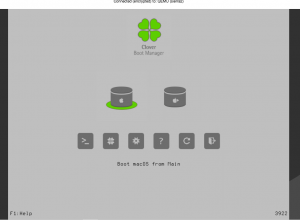
Ok Managed to get Clover to boot, but I don’t see any other drives, not the install iso or the main drive
http://imgur.com/tnWkDmo
Can you paste your VM config at pastebin or something and link it here?
http://pastebin.com/LNrFEbuX
You have “machine: pc-q35-2.4” commented out, this needs to be present.
If u uncomment is the VM does not start
http://pastebin.com/A2TNXE72
Rename “ide2” to “sata0” and rename “ide1” to “ide2”. Change “bootdisk” to “ide2”. (Q35 only allows one drive on each of the 0/1, 2/3 IDE channels)
Ok Now it boots again but I still don’t see any drives in clover
Add “-smbios type=2” to the args line, remove the “kvm: 0” line.
Ok Boots to clover but still no drives showing
http://pastebin.com/FyHxrJFp
Ah! It looks like, unlike Enoch, Clover boot requires the “media=cdrom” part of the CD definition to be present for it to be able to see it:
sata0: disk1:iso/Install_macOS_Sierra_(OS_X_10.12).iso,media=cdrom
Does the boot loader not also need to be on the iso?
Nope, the bootloader on the disk should offer to boot from both the hard drive and the install CD for you.
Nick thanks for your help. I am ready to give up.
I can get the installer to boot, I get
exit reason namespace 2 subcode 0x4, description none
Which may refer to a CPU issue, but I cannot seem to get it fixed.
Yeah, it’s sounding like a hardware problem at this point. Which CPU do you have? I suppose if it is older than Penryn then it might be missing features that macOS is trying to use. (The config should be advertising the CPU as Penryn).
Yep they are old Xeon E5310.
Ahh, that CPU is Clovertown, the generation previous to Harpertown, which was a Penryn derivative. It doesn’t have SSE4.1, which is a Sierra requirement.
Do you think El Capitan will run?
I think it will, there’s a lot of complaints about the SSE4 requirement of Sierra which makes me think that it wasn’t required previous to that.
You should be able to use a similar install process, using the Clover bootloader disk you added. On the args line of your VM configuration, change Penryn to core2duo. I haven’t tried El Capitan myself.
Result with El Captain, can t even see where it is failing
http://imgur.com/xI5neFX
Made the install Iso with Diskmaker X. do you think that could be the problem. Do I need to do something special to the iso?
I would use the build instructions from my Sierra post. It runs a whole bunch of commands to make the ISO in that script.
EDIT: oh, right, the script requires a Mac to run on which you don’t have. Forget that then!
Most likely place for things to be going wrong is the Clover configuration, but it’s hard to know what to tweak there.
Add the “kernel” parameter back to the args (described in the first blog post) and switch back to SeaBIOS boot. Then boot direct from the CD image (remove the Clover volume).
Follow debugging steps from here to try to get that working:
https://github.com/kholia/OSX-KVM
Nick
Thanks for all your help, I have managed to get an install of El Capitan.
And yes I do have a MacBook
Nick was wondering if you know how to improve the resolution on the VM, only 800×600 available, also there is a ghost pointer if I connect with VNC
I was able to achieve this on Sierra by switching to OVMF/Clover boot. After that works, enable automatic login for your user in the Mac settings, and enable Mac screen sharing. Mount the EFI volume and edit EFI/CLOVER/config.plist to change the screen resolution from 800×600 to 1920×1080.
Reset the VM. Enter the Proxmox OVMF configuration by pressing F2 during boot, set the screen resolution in the “Device Manager/OVMF Platform Configuration” section to 1920×1080, and reset to boot macOS with the new resolution.
Connecting using VNC or Screen Sharing from another machine now reveals a perfect 1920×1080 display (though somewhat lacking in video acceleration).
To do better I think you’d have to pass through a supported PCIe video card.
don’t forget to mount the right EFI volume – just had a faceplam moment when i realized I’d mounted the EFI partition that lives on the main mac os x disk rather than the dedicated EFI disk.
Hi Nick,
I have my Sierra installed and working with pass through of my XFX HD7870 using SeaBIOS. But if I try using clover it hangs every time at pci configuration begin, I’ve tried multiple boot args nothing works. What am I overlooking? The video card works fine using OVMF with a windows guest and pass through. Also clover boots fine if I don’t add the video card to the guest.
Thanks Eric
Searching for that error and “hackintosh” turns up a lot of Clover setting tweak suggestions, so it sounds like this is a problem that happens even on physical machines and there’s good hope of finding a solution in there.
I can’t think of anything myself.
Ya that’s what I’ve been searching for so far none of the suggestions have worked. I’m gonna try a clover install directly on my hardware next and see if I have same issue. Great guide too by the way very helpful on setting up proxmox for Mac VMs!! Either way worst case I can run using SeaBIOS it’s just not ideal for my server setup….
Thanks for the response,
Eric
I did a reinstall recently and had this same problem. I found that power cycling the host (not just restarting it) cleared it. I guess the card gets into a funny state from which it cannot be properly reset.
Whenever I try clover (I’ve tried this howto several times) I get to a white apple logo and then nothing. No status bar.
Anyone else seeing that?
If you hit space at the main Clover screen, you can choose boot options. Try turning on Verbose mode, might give a clue to where it’s stopping.
thanks for the tip!
I just get a line of asterisks:
**************************************
any clues?
Hi Nick,
Terry here again, hoping you can help. I have not run my El Capitan VM in some time, and changed nothing other than putting more RAM in the host.
I now get a VM Swap Subsystem is ON, and the boot process halts there, any idea?
As I recall, Proxmox has an option to run MemTest from its boot menu, I’d give that a go to make sure the new RAM is okay.
Does all seem to be fine
Nick
Can you assist my El Capitan VM stopped working, Clover is not detecting the HDD, can you assist
You didn’t make any changes before it stopped working? Maybe the filesystem is damaged, I would boot from the install CD and use the terminal there to examine the disks (some combination of diskutil list and fsck_hfs).
Are you using Clover/UEFI or Enoch/SeaBIOS to boot?
Clover
I can boot into install disk, but no mouse in the console window, so can’t fo any further
Do you have the USB mouse and keyboard entries at the end of /usr/share/qemu-server/pve-q35.conf as described here?
http://www.nicksherlock.com/2016/10/installing-macos-sierra-on-proxmox-4-3-qemu-2-6-1/
Just did that, thanks and now it works, although the mouse does not sync properly
After I updated the Mac OS I got an kernel error.
Is it not possible to update the Mac OS normally?
I’ve not had any problems applying updates to mine.
Hi Nick,
I’m trying to get this working with a 10.12.3 iso i created as per you directions. I was following your directions about going directly to clover without installing via enoch (just using the disk image you made to install the boot loader 1st and then install os x after). i couldn’t get it to work, put it down for a few weeks and now i can find neither the disk image nor the directions – did you remove that stuff? something about using the dd command as i recall…
The Problem I’m having is similar to Terence Faul – I’m seeing no disks once the machine boots to the clover screen. my processor is a xeon 5600 series so i believe that shouldn’t be the problem.
my vm config is:
args: -device isa-applesmc,osk="" -cpu Penryn,kvm=off,vendor=GenuineIntel -smbios type=2bios: ovmf
boot: cdn
bootdisk: sata2
cores: 4
cpu: Penryn
efidisk0: local-zfs:vm-103-disk-3,size=128K
machine: pc-q35-2.4
memory: 8192
name: osXSierraServer1
net0: e1000-82545em=,bridge=vmbr0
numa: 0
ostype: other
sata0: local:iso/Install_macOS_Sierra_(OS_X_10.12.3).iso,media=cdrom,size=1597568K
sata1: local-zfs:vm-103-disk-1,size=64G
sata2: local-zfs:vm-103-disk-2,size=1G
scsihw: virtio-scsi-pci
smbios1: uuid=
sockets: 1
tablet: 0
I removed that section because it was out of date (won’t work on 10.12.4) and I’m not sure if it was ever able to successfully boot the installer anyway (I don’t recall the results of those tests). I’ve put it back now with a note that it’ll only work on 10.12.3 or older.
Your configuration looks identical to mine, except I’m using IDE0 and IDE2 rather than SATA. I can’t work out why it would be that some people’s installers can’t see the disks, seems like a very odd problem. I’ve heard it’s possible to partition the disk images using Linux beforehand and the installer will see it then.
I’ve updated that last section now with the newer Clover 4061 to support 10.12.4!
thanks for putting it back – i eventually realized that my OS X disk image was 2.5ish GB too small. I went back to the real mac and reran the process of making the disk image – for what ever reason it worked – clover saw it and i was able to format the other disks just like your instructions say to do. I’ve got 10.12.3 so i think i’ll sit on it like that till proxmoxs’ qemu gets patched but its nice to know I’ve got options – many thanks!
Hello Nick,
I am trying to do a fresh Install of Sierra on a Proxmox KVM. Your tutorials are very simple to understand so its the perfect starting point for me.
I tried your previous tutorial but impossible to get my OSK key so I switch to this tutorial.
I stricly followed it, I can boot to Clover, I can use Keyboard/Mouse, but when I boot to the Sierra Installer, The screen is stuck as soon as the Mouse is appearing.
Do you have any idea ?
My conf is :
args: -device isa-applesmc -cpu Penryn,kvm=off,vendor=GenuineIntel -smbios type=2
bios: ovmf
boot: cdn
bootdisk: ide2
cores: 2
cpu: Penryn
efidisk0: local-lvm:vm-103-disk-3,size=128K
ide0: local-lvm:vm-103-disk-2,size=32G
ide2: local-lvm:vm-103-disk-1,size=1G
machine: pc-q35-2.4
memory: 8192
name: osx.fixweb
net0: e1000-82545em=56:F8:60:AA:97:E3,bridge=vmbr0
numa: 0
ostype: other
sata0: local:iso/bck.iso,media=cdrom,size=6107218K
scsihw: virtio-scsi-pci
smbios1: uuid=535a56a7-4b27-49ad-a9f1-61611003d533
sockets: 2
tablet: 0
My processors are Xeon V3
I tried recently and was unable to boot the install CD using Clover. Use the SeaBIOS approach instead and install Clover later if you want it. The OSK in the config you posted is perfect.
The problem is that Its not working with SeaBios approach either…
because i was unable to get the OSK with the small C program.
Do you have an idea to get a valid OSK ?
The OSK you posted in your configuration was already perfect. The key is not a string of random letters or anything.
When I start in Seabios approach, i get a message : “OSK invalid key”
Are you installing 10.12.4? If so, you need to patch QEMU to improve the OSK support:
http://www.nicksherlock.com/2017/04/fix-for-macos-sierra-10-12-4-dont-steal-mac-os-error-on-boot-on-proxmox-4-4/
Nick is it possible to create a start to finish post on how to install Sierra 10.12+ on Proxmox 5.5? I have now tried to follow your various install guides without luck. I think the problem is that I have tried so many various ways to get this to work, that the instructions you have given overlap some steps. Im attempting to follow this post with vmware-cpuid, using Clover.. without an already installed OS (havent been able to install due to the key issue)
My guide on “installing Sierra on Proxmox” is complete as far as I know. Note that you have to get Sierra working completely that way before trying to convert it to Clover (I’ve never been able to boot the Sierra installer using Clover).
The OSK key is a requirement for booting Sierra. You can probably google for someone who has leaked it online if you don’t have a Mac to read it from.